


Automating file re-organization on Windows with NodeJS
Writing a nodejs script to re-order files on Windows and update its registry.


I dual boot, which means I run two operating systems on my personal computer. I use Microsoft Windows operating system as my personal use OS and Linux Mint, an Ubuntu-based Linux distribution as my code-writing environment, which also allows me to tinker around with anything and everything on the OS, without fear of losing personal files.
On Windows, I tend to take a lot of screenshots using the (🪟 + PrtSc) command, I do this for very different reasons. Over time, I realized I now had an issue with how Windows labeled each screenshot image file in the folder where they were saved.
Each screenshot captured on Windows is named in the format >> ( Screenshot + (Number) + .png ).

'Screenshot' describes how the image is taken, '.png' is the file format the image is saved in, and 'number' is a variable that gets incremented with every new screenshot. The very first time you take a screenshot on windows, that first picture is stored as 'screenshot (1).png', and that number (1) is stored in Window's registry. The next time you take another screenshot, it pulls the last value saved in the registry, adds one(1) to it and names the new screenshot with that value. That would mean the next screenshot saved after the first image would be saved as 'screenshot (2).png'.
Now herein lies the issue. The numbering process by Windows for naming the file only goes up and never adjusts to take account of deleted images or a change in the file numbering/number of files in the screenshot folder. It continuously increments the last saved number in the screenshot counter registry and names new files with that value forever!

Taking a look at the image above in the screenshot folder, you would find examples of my earlier complaints regarding discrepancies with the file naming/numbering. We'll be fixing that with our NodeJS script later in this article. The script would be to rename and rearrange the screenshot files in numerical descending order and thereafter update Windows' registry with the new screenshot file numbers.
You might say, but that's not a big deal, and you could live with just how Windows handles naming your screenshot files, and you'll be very right. Millions of Windows users do these and it in no way hinders how they use their machine. But unfortunately, I have been bestowed the power to write codes and make things conform, and I would love to use this power at this junction.

Also, another angle to this is that it's a fun way of telling your machine what to do, when to, and just exactly how to do what you want. Now let's get to business.
THE POWER IN CODE
- GOAL
The script I'll be writing would do three main things:
Take a count of all the files(pictures) in the Screenshot Folder.
Start from the top and then re-order and rename the files in descending order.
Lastly, talk to Windows' registry to update the screenshot counter index with the new numbers of files in the screenshot folder.
To make things easily accessible, the javascript file would be in the same directory as the screenshot folder, and to also speed up execution time, there would be a 'sleight-of-hand' approach to run commands from Windows' search bar, shown later in the article.
- REQUIREMENTS
In this article, I'll be using Node.js on a Windows machine. Node.js is a popular tool for building server-side applications and also provides several useful modules for working with the file system. To follow along, you would need :
A computer
Windows Operating System (Win-11 or Win-10 or Win-8 or Win-7)
NodeJS
To Install nodeJS on your windows machine:
Download the NodeJS installer from the official website (nodejs.org).
Choose the appropriate installer based on your operating system, here we're using Windows.
Run the installer and follow the instructions.
Once the installation is complete, you can verify it by opening a terminal (or command prompt) and running the command
node -v. This should display the version of Node.js that you just installed.
Let's get Started
Navigate into the Screenshot folder to create a new folder to house the nodeJS project. For mine, I created a folder and named it 're-order' in the Screenshots directory.
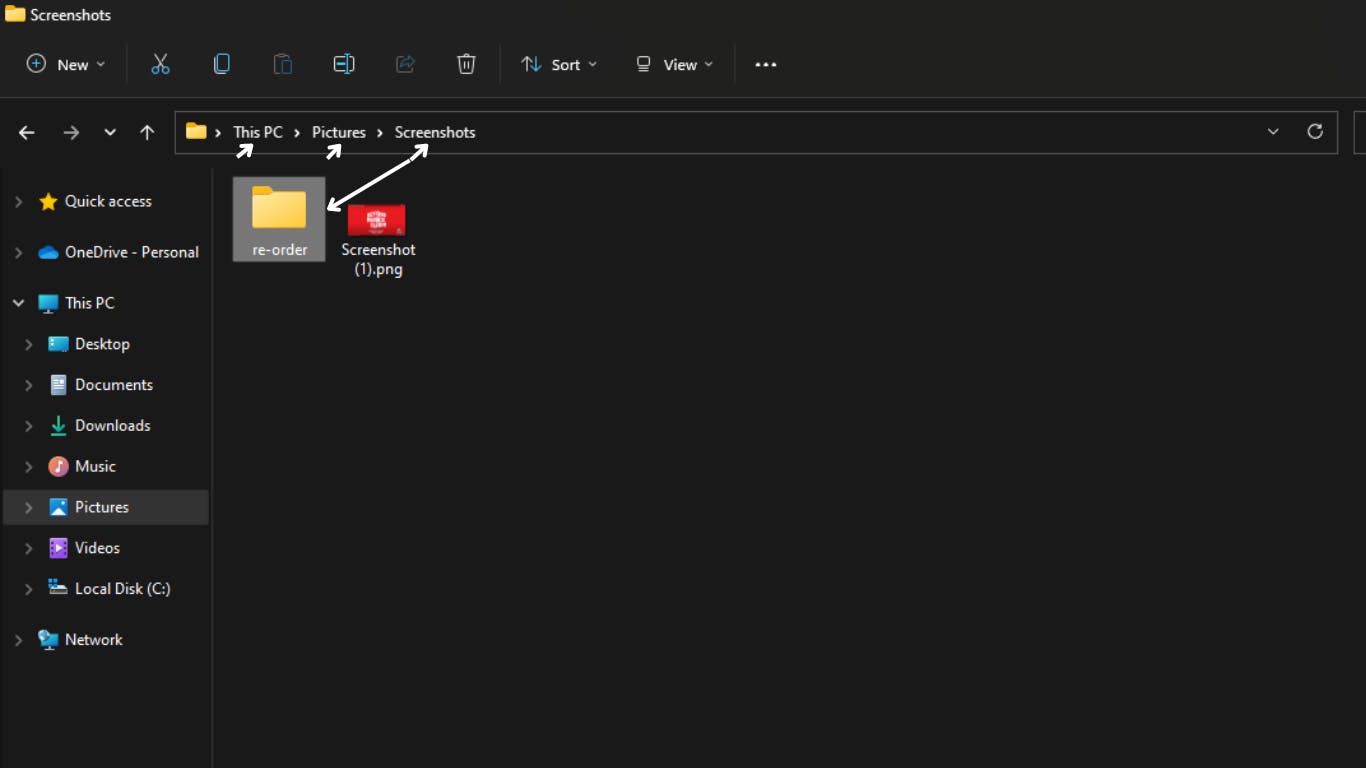
Use the context menu on the folder to open it in your preferable code editor, I use Windows VS Code. Within VS Code, you can use a terminal, the terminal is where I would perform all nodeJS-required executions..⬇️..
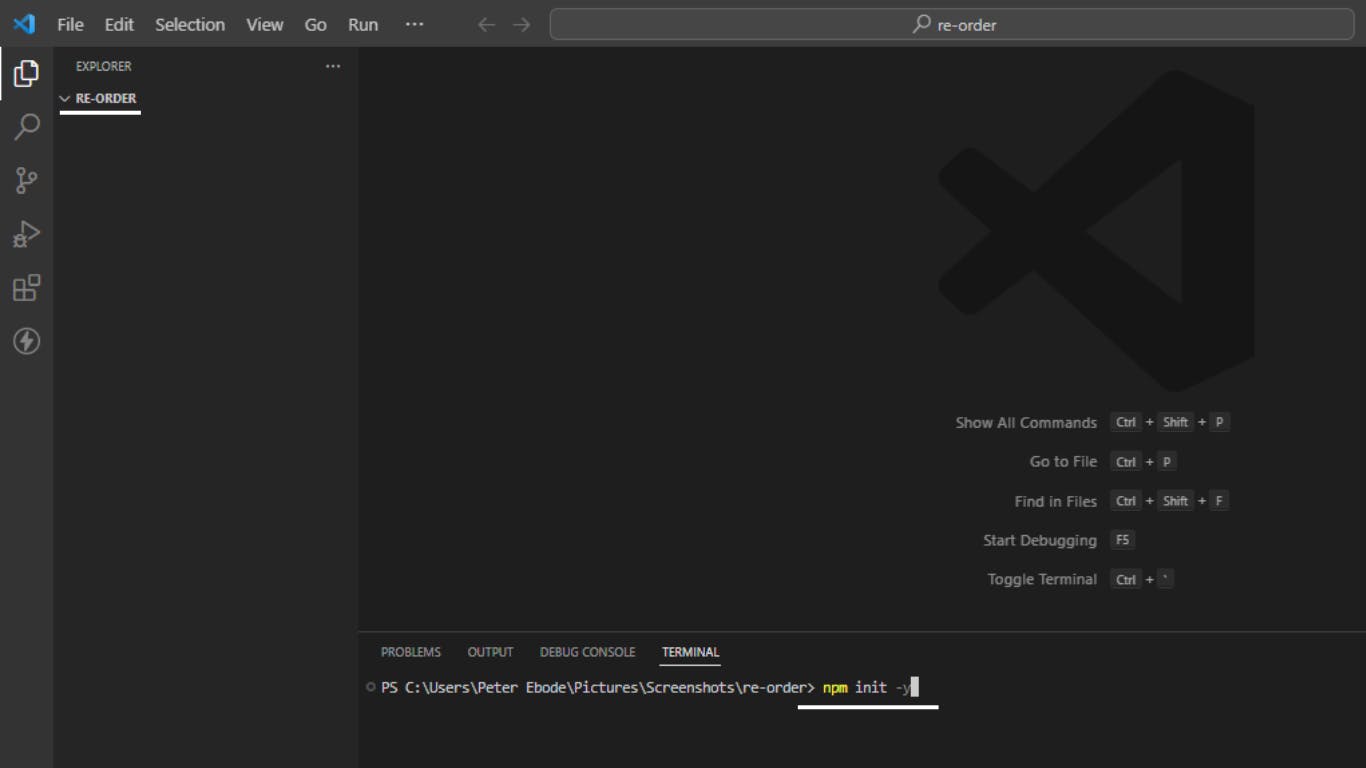
To start a new NodeJS project, we need to initialize the project with the first set of files required to function properly. To do that we use the command below
npm init -y
the '-y' flag is to fill in every requirement with default values, so we don't have to manually do that. If you want to, you can simply drop the -y flag and fill it in yourself. Once you're done, this process creates a 'package.json' file.
The next thing would be to install the required external dependencies using npm. In this project, we would be mainly using the 'fs' and 'path' modules, both of which are built-in to nodeJS and don't need an install, but to talk to Windows registry, we need an external package, 'regedit'.
To install 'regedit'.
npm install regedit
Before we get into writing the code fully, we can make some changes to the file structure and the 'package.json', file to speed the code execution process and add some level of organization.

Three main changes were done to :
Create the javascript file where all the code would be written in, its named 're-order.js'.
Create a folder('src') to put the JS file into, for a level of organization.
Update the 'scripts' object in the package.json file, to point npm at the javascript file just created. This makes it easier to run the code, rather than having to always type 'node re-order.js' and having to keep track of the name and the folder you're in, you could just use 'npm start' and let npm handle the rest.
We're good to commence writing the code now. As you observed, there is also a node_modules folder in the structure now, that's where the 'regedit' module we downloaded earlier is stored and also where any future module installed would be saved.
Writing the Code
We can now head over to our re-order.js file and make things happen in there. Earlier, we made three goals, the first being to 'take a count of all the files in the screenshot folder'. Let's start there.
The imports and constants
const fs        = require('fs');
const path      = require('path');
const regedit   = require('regedit');

//Path to screenshot folder
const screenshotFolder = 'C:\\Users\\Peter Ebode\\Pictures\\Screenshots';

//Registry key for screenshot counter
const keyPath = 'HKCU\\SOFTWARE\\MICROSOFT\\Windows\\CurrentVersion\\Explorer';
In the code body above, two main things are happening, first, is the import of modules that the program would later require to run. The modules used are :
'fs': The 'fs' module short for fileSystem, is a built-in module in Node.js that provides an interface for working with the file system. It allows you to read, write, and manipulate files and directories on your computer or server.'path': The 'path' module in Node.js is a built-in module that provides utilities for working with file and directory paths.'regedit': The 'regedit' npm module is a third-party package that provides a simple interface for working with the Windows registry in Node.js. The Windows registry is a database that stores configuration settings and options for the Windows operating system and other software applications.
The next two lines are for constants that hold the path to the screenshot folders('remember to update yours to point to your screenshot folder') and also the keypath to the screenshot counter variable in Windows registry.
⚠️ | At this stage, I would like to point out that it is a bad idea to play around with the files and configurations in Windows registry, but I have taken my time to ensure we are only reading and writing to the right files, and if you are uncomfortable doing that, you could just comment out the section in the code doing that. I would leave a comment in the code for that.
Reading files in the directory and filtering
// Read all files in screenshot folder
fs.readdir(screenshotFolder, (err, files) => {
    if (err) {
      console.error(err);
      return;
    }

    // Filter only image files (png, jpg, jpeg)
    const imageFiles = files.filter(file => {
      const ext = path.extname(file).toLowerCase();
      return ext === '.png' || ext === '.jpg' || ext === '.jpeg';
    });

});
This section of the code uses the fs module to read all the files in the screenshot directory specified by the screenshotFolder variable. It then filters the list of files to only include image files with the extensions ".png", ".jpg", or ".jpeg". In a normal scenario, we should only have '.png' files in the screenshot folder, but just in case, there is an imported image or something changes, to handle those cases, we're making room for possible jpg, png and jpeg files. This also stops the code from picking up the re-order folder we created for the code in the same screenshot folder.
A more detailed breakdown of the code :
fs.readdir(screenshotFolder, (err, files) => {...}): This line reads the contents of the screenshot directory specified by thescreenshotFoldervariable and passes the result as an array of filenames to the callback function. If there is an error, theerrargument will be set, and the error will be logged to the console.const imageFiles = files.filter(file => {...}): This line filters and returns the list of image files by creating a new array (imageFiles) that includes only the files that meet the condition that the file extension (determined using thepath.extnamefunction) must either be ".png", ".jpg", or ".jpeg".
Sorting screenshot image files in order
// Sort image files by filename (numeric order)
imageFiles.sort((a, b) => {
  const aFile = parseInt(path.basename(a, path.extname(a)).match(/\d+/)[0]);
  const bFile = parseInt(path.basename(b, path.extname(b)).match(/\d+/)[0]);
  return aFile - bFile;
});
This is a continuation of the previous code, here it sorts the list of image files obtained in the previous step (imageFiles) in numerical order based on their filenames.
A breakdown of the code:
imageFiles.sort((a, b) => {...}): This line calls thesort()method on theimageFilesarray and passes a callback function as an argument. The callback function is used to compare two elements in the array and determine their sort order.const aFile = parseInt(path.basename(a, path.extname(a)).match(/\d+/)[0]);: An example of what this section does is that it would pull out the number 33 in the word 'Screenshot (33).png' and save it in the variableaFile. This is done by first using thepath.basename()function to extract the filename without the extension, then using a regular expression (/\d+/) to match the first sequence of digits in the filename, and finally usingparseInt()to convert the matched digits into an integer.const bFile = parseInt(path.basename(b, path.extname(b)).match(/\d+/)[0]);: This line does the same thing as the previous line but for the second file being compared (b). The numeric part of the filename is extracted and stored in thebFilevariable.return aFile - bFile;: This line is the comparison function used bysort(). It returns a negative value ifashould be sorted beforeb, a positive value ifbshould be sorted beforea, and zero if their order doesn't matter. In this case, it comparesaFileandbFilevariables (which hold the numeric parts of the filenames) and returns the difference between them. This has the effect of sorting the array in ascending order based on the numeric part of the filenames, hence the screenshot file names are sorted in descending order based on their number value.
Renaming the files to have sequential file names in the order from the previous sort
// Rename image files to have sequential filenames (starting from 1)
console.log('Screenshots file Re-organization started...')
imageFiles.forEach((file, i) => {
  const oldPath = path.join(screenshotFolder, file);
  const newPath = path.join(screenshotFolder, `Screenshot (${i + 1})${path.extname(file)}`);

    fs.rename(oldPath, newPath, err => {
        if (err) {
            console.error(err);
            return;
        }
    });

});

console.log(`Screenshots file(${imageFiles.length}) Re-organization complete.`)
This also continues on the previous code, the file renaming happens here.
The code breakdown:
console.log('Screenshots file Re-organization started...'): This line logs a message to the console to indicate that the file renaming process has started.imageFiles.forEach((file, i) => {...}): This line loops through each file in theimageFilesarray and passes it to a callback function. This callback function also receives the index of the current file (i) as an argument.const oldPath = path.join(screenshotFolder, file);: This line constructs the path of the original file by joining thescreenshotFoldervariable (which holds the path to the directory containing the files) with the current filename (file).const newPath = path.join(screenshotFolder,Screenshot (${i + 1})${path.extname(file)});: This line constructs the path of the new file by joining thescreenshotFoldervariable with a new filename that includes the index (i) plus 1, and the original file extension. The new filename is enclosed in backticks (``) to allow for string interpolation.fs.rename(oldPath, newPath, err => {...});: This line renames the original file to the new filename using thefs.rename()method. If there is an error, it is logged to the console.console.log(Screenshots file(${imageFiles.length}) Re-organization complete.): This line logs a message to the console to show that the file renaming process is complete, along with the total number of files that were renamed.
That's all for the screenshot file counting, sorting and renaming process, the first two set goals have been achieved. The last one to talk to the registry to update it with the files we counted in the screenshot folder is all that's left.
Talking to Windows registry to read and update windows screenshot counter value
//STOP HERE IF YOU DO NOT WANT TO TOUCH WINDOWS REGISTRY
//REGISTRY UPDATE
// Get the previous screenshot counter value from the registry
regedit.list([keyPath], (err, result) => {
  if (err) {
     console.error(err);
     return;
 }

    //Previous Screenshot Value
    const previousValue = result[keyPath].values['ScreenshotIndex'].value;
    //New Value from Directory scan
    const newValue      = imageFiles.length;

    // Update the screenshot counter value in Windows' registry
    regedit.putValue({
        [keyPath]: {
            'ScreenShotIndex': {
                value: newValue,
                type: 'REG_DWORD'
             }
         }
        },(err) => {
            if (err) {
                console.error(err);
                return;
            }

    console.log(`\nRegistry Screenshot counter value updated from ${previousValue}, to a New value of ${newValue}.\n`);
    });

});
This final section of the code updates the Windows registry with the latest screenshot index(Gotten from counting the screenshot files).
Here's a breakdown of the code:
regedit.list([keyPath], (err, result) => {...}): This line uses theregeditpackage to list the values in the Windows registry key specified by thekeyPathvariable defined earlier in the code. The callback function receives an error object and the result object.const previousValue = result[keyPath].values['ScreenshotIndex'].value;: This line extracts the previous screenshot index value in Windows registry from theresultobject. It does this by accessing thevalueproperty of theScreenshotIndexvalue under the specifiedkeyPath.const newValue = imageFiles.length;: This line sets the new screenshot index value to the length of theimageFilesarray (that's the number of files in the screenshot directory).regedit.putValue({...},(err) => {...}): This line uses theregeditpackage to update theScreenshotIndexvalue in the Windows registry with the new screenshot index value. It does this by calling theputValue()method with an object containing the new value, type, and registry key path. The callback function receives an error object.console.log(\nRegistry Screenshot counter value updated from ${previousValue}, to a New value of ${newValue}.\n);: This line logs a message to the console to indicate that the registry update is complete and to display the previous and new screenshot index values.
ALL THE CODE
const fs        = require('fs');
const path      = require('path');
const regedit   = require('regedit');

const screenshotFolder = 'C:\\Users\\Peter Ebode\\Pictures\\Screenshots'; //Path to screenshot folder
const keyPath = 'HKCU\\SOFTWARE\\MICROSOFT\\Windows\\CurrentVersion\\Explorer'; //Registry key for screenshot counter

// Read all files in screenshot folder
fs.readdir(screenshotFolder, (err, files) => {
    if (err) {
      console.error(err);
      return;
    }

    // Filter only image files (png, jpg, jpeg)
    const imageFiles = files.filter(file => {
      const ext = path.extname(file).toLowerCase();
      return ext === '.png' || ext === '.jpg' || ext === '.jpeg';
    });

    // Sort image files by filename (numeric order)
    imageFiles.sort((a, b) => {
        const aFile = parseInt(path.basename(a, path.extname(a)).match(/\d+/)[0]);
        const bFile = parseInt(path.basename(b, path.extname(b)).match(/\d+/)[0]);
        return aFile - bFile;
    });

    // Rename image files to have sequential filenames (starting from 1)
    console.log('Screenshots file Re-organization started...')
    imageFiles.forEach((file, i) => {
        const oldPath = path.join(screenshotFolder, file);
        const newPath = path.join(screenshotFolder, `Screenshot (${i + 1})${path.extname(file)}`);
        fs.rename(oldPath, newPath, err => {
            if (err) {
                console.error(err);
                return;
            }
        });
    });
    console.log(`Screenshots file(${imageFiles.length}) Re-organization complete.`)

    //STOP HERE IF YOU DO NOT WANT TO TOUCH WINDOWS REGISTRY
    //REGISTRY UPDATE
    // Get the previous screenshot counter value from the registry
    regedit.list([keyPath], (err, result) => {
        if (err) {
        console.error(err);
        return;
        }

        const previousValue = result[keyPath].values['ScreenshotIndex'].value; //Previous Screenshot Value
        const newValue      = imageFiles.length; //New Value from Directory scan


        // Update the screenshot counter value in Windows' registry
        regedit.putValue({
                [keyPath]: {
                    'ScreenShotIndex': {
                        value: newValue,
                        type: 'REG_DWORD'
                    }
                }
            },(err) => {
            if (err) {
            console.error(err);
            return;
        }

            console.log(`\nRegistry Screenshot counter value updated from ${previousValue}, to a New value of ${newValue}.\n`);
        });

    });

  });
For access to the full code, you can check out the repo here on GitHub.
If you find any bug or have an improvement, you can fork the code on the repo and make a Pull Request with your changes, I would follow up.
THE EXECUTION
To execute the code, if you followed the file structuring used earlier, you can use the command :
npm start
Or if not, but you're in the directory with the re-order.js file, you can use the command :
node re-order.js
5,4,3,2,1, execute...
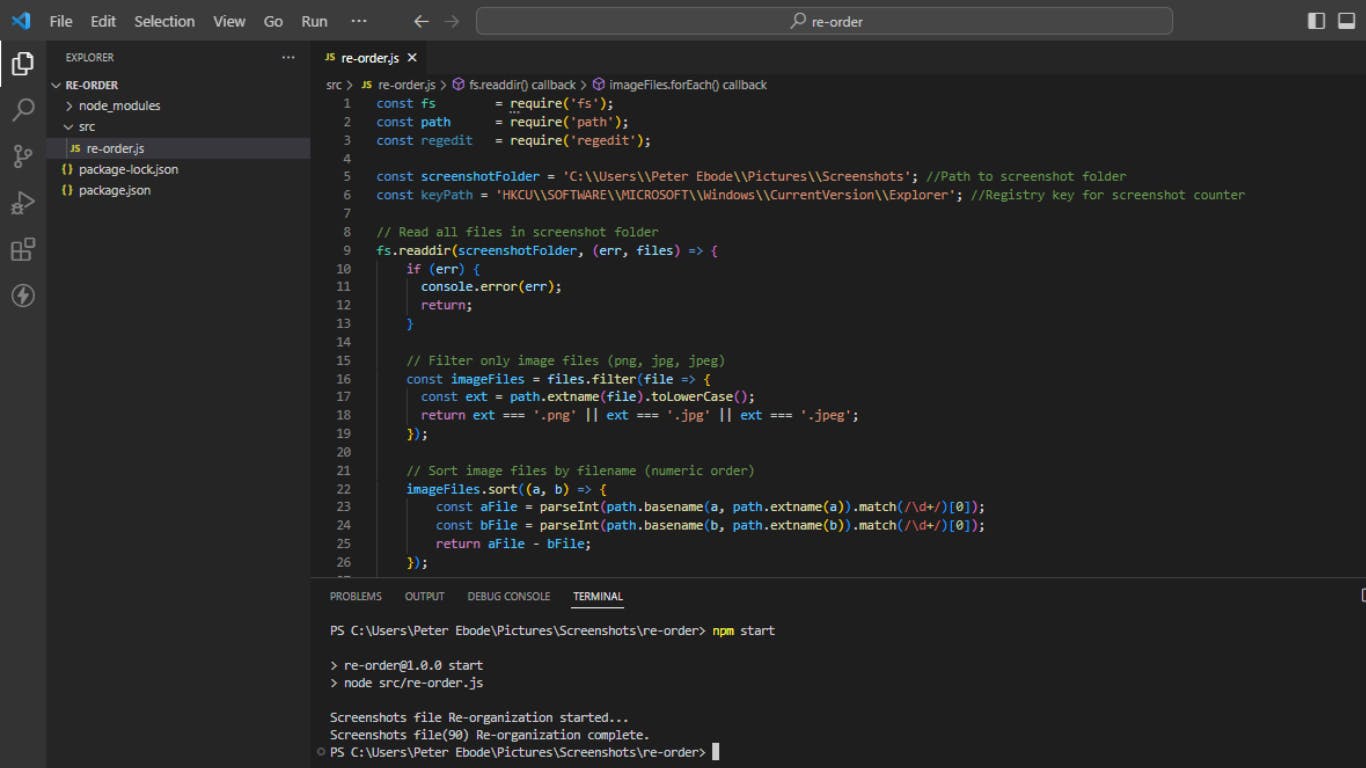
This shows the code executed from within Microsoft VS Code(Terminal).
The Code Effect
- BEFORE : ⤵️
This shows the screenshot folder is quite disorganized and badly labeled.
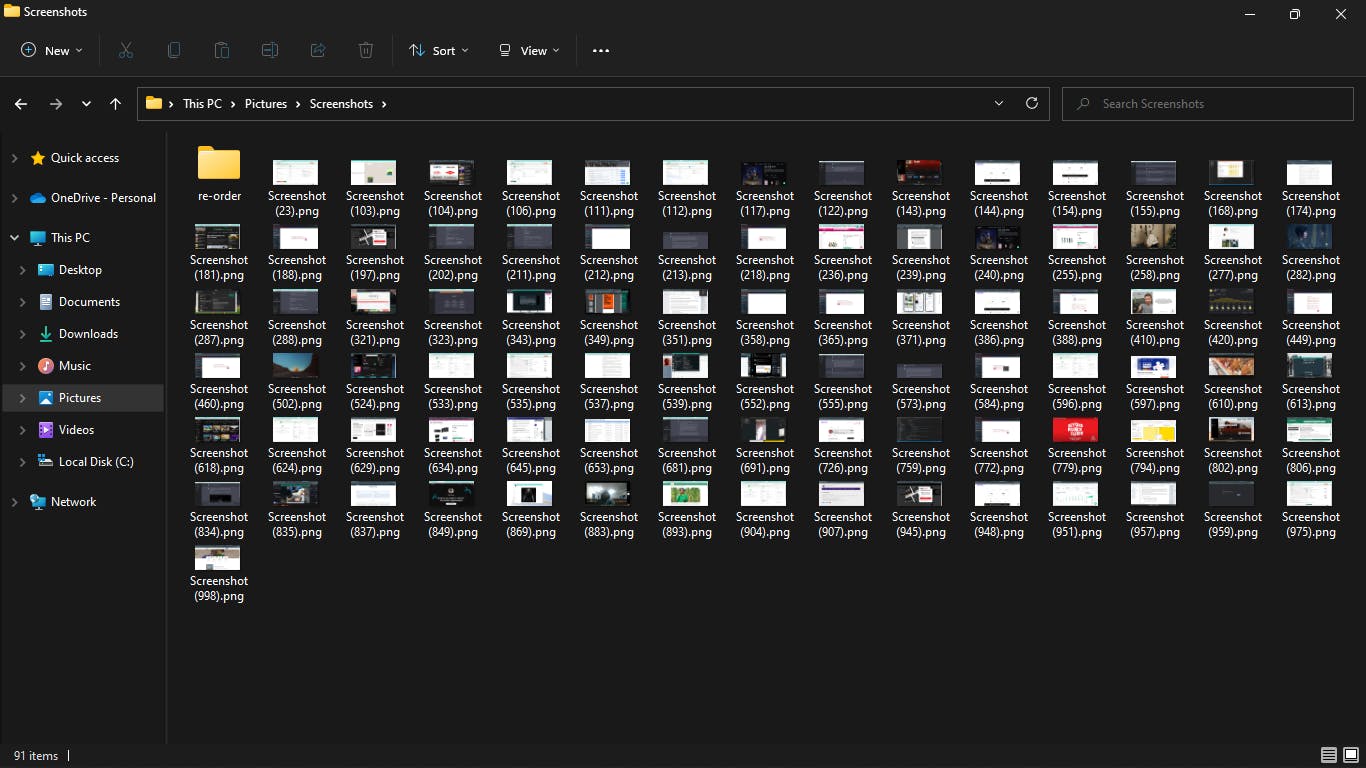
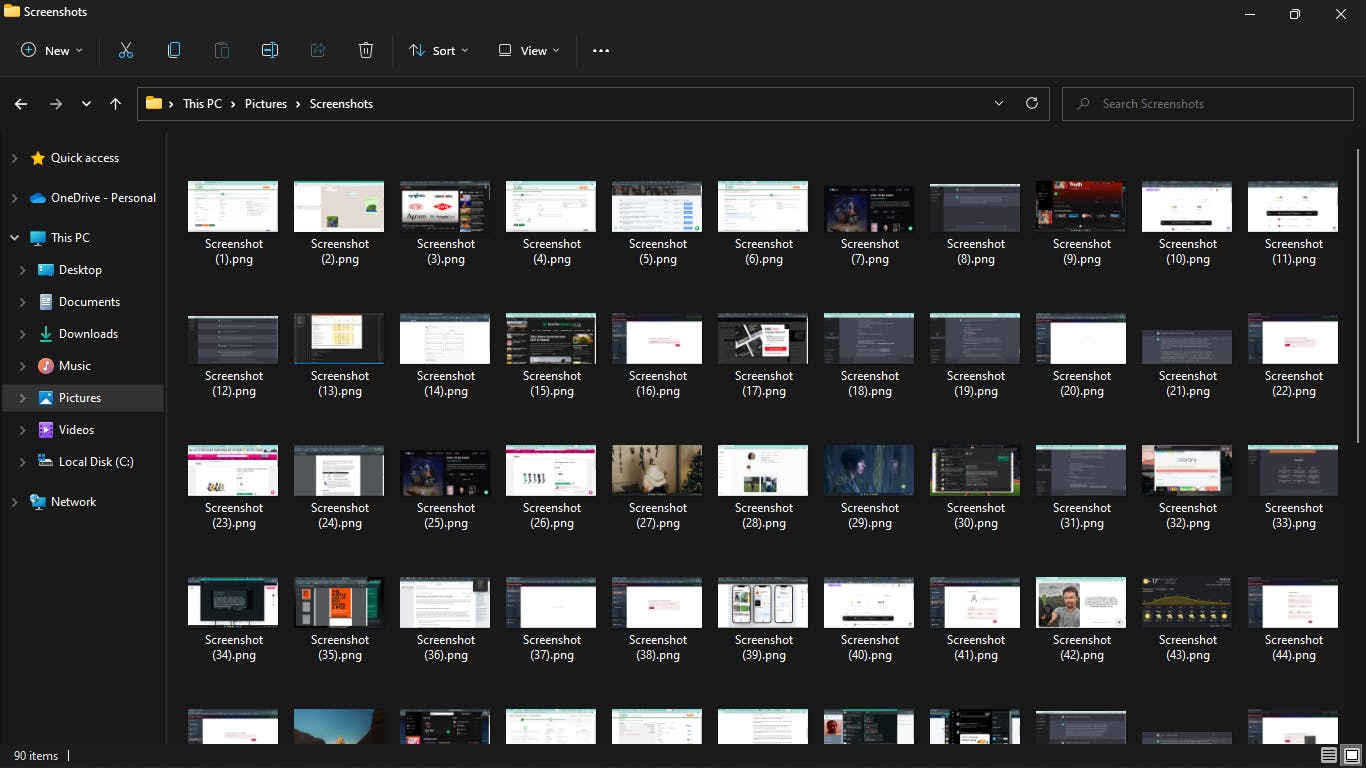
- AFTER : ⤵️

We now have a well-organized folder. Also, because we updated the registry, the next screenshot we take would be named in continuation from where the last file numbering stopped. In the case of the image above, the next screenshot file would be named 'Screenshot (91).png'

Yep!! The mission is complete, but sure, we can still spice things up a little.
The SPICING
- Speed up Execution
To speed up how we execute the code, rather than having to always open VS code or a terminal to run the program from there, we could instead and very simply execute it from our search bar context.

If you remember how we structured our folder for the code, once you have nodeJS installed and set to path, all you just have to do is pretend like you want to search, but in this case, do a 'node' command followed by the relative path to the Javascript code, and that code would get executed. A search for 'node re-order/src/re-order.js' followed by an enter does the trick in this case.
- Extra Effect(Folder hiding)
To make the folder not get in the way of your pictures, we can use the Windows folder context menu to hide the folder. To do that, you can follow the Image directions below :
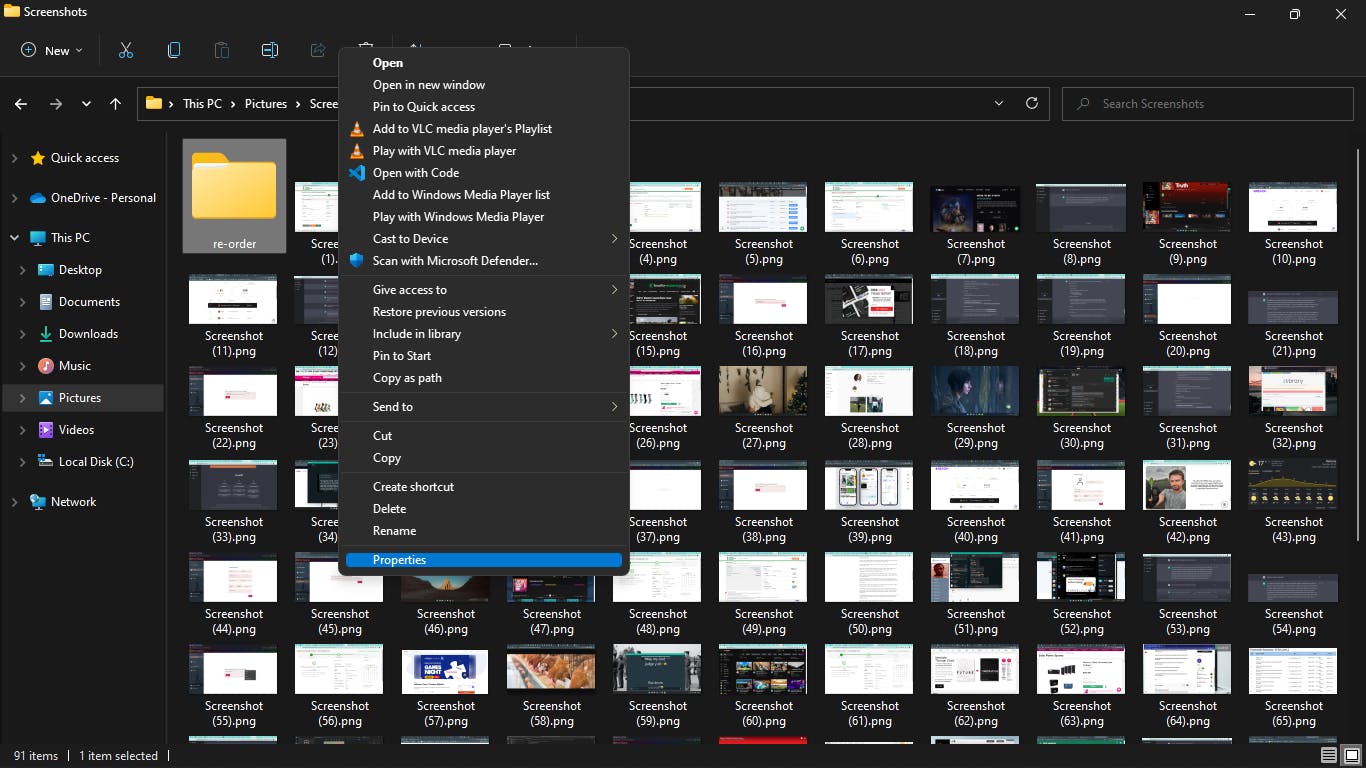
(⬆️) Right Click on the folder to open the context menu and click on 'Properties' .

(⬆️) Tick the 'Hidden' box option and click 'Apply', to make the folder hidden.
Select the option to hide folders and files in the folder.
(⬆️) The folder becomes INVISIBLE..
To see the folder, use the view option in windows to see hidden items, and you can follow the process backward to unhide the folder.
This brings us to the end of the article, thanks for your time. If you tried it out on your machine and have any questions, issues or an improvement to the code, feel free to throw them over in the comments section.

Thank You..